Does the size of a parachute matter?
How does a parachute work? Find out in this science project
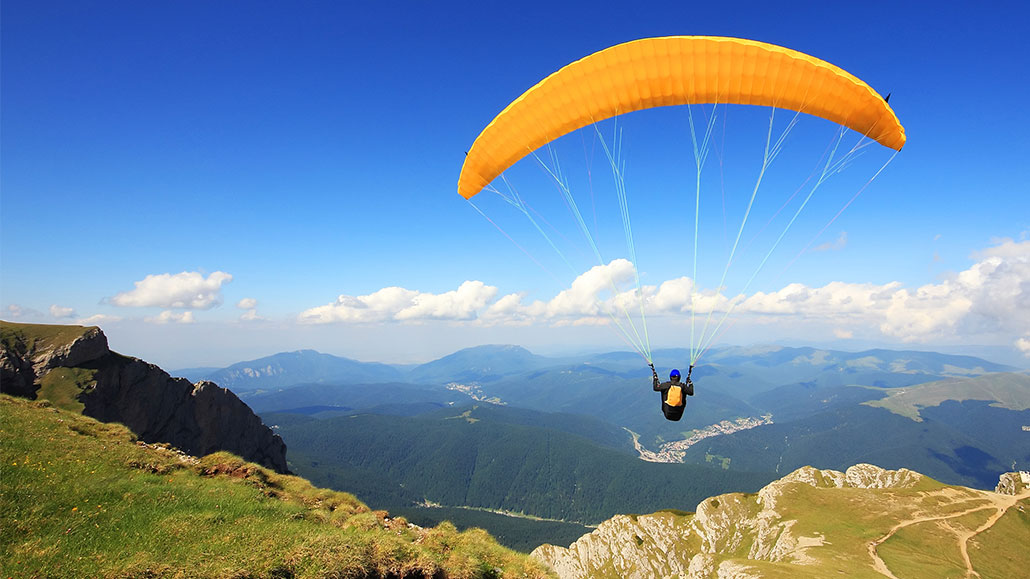
Does parachute size matter when it comes to how you fall? An experiment can help you investigate the question.
Sorin Rechitan/EyeEm/Getty Images
Objective: Test different sized parachutes to see how changes in the size of the parachute affect flight.
Areas of science: Aerodynamics & Hydrodynamics, Space Exploration
Difficulty: Easy intermediate
Time required: ≤ 1 day
Prerequisites: None
Material availability: Readily available
Cost: Very low (under $20)
Safety: No issues.
Credits: Sara Agee, Ph.D., Science Buddies
Sources: This project was inspired by content from the NASA Explorers School program and Schlumberger’s SEED program.
In the sport of skydiving, a person jumps out of an airplane from a very high altitude, flies through the air, and releases a parachute to help them fall safely to the ground, as shown in Figure 1. The parachute slows down the skydiver’s fall so that they can land on the ground at a safe speed. How does the parachute do this?
As the skydiver is falling, the force of gravity is pulling the skydiver and their parachute towards the earth. The force of gravity can make an object fall very fast! The parachute slows the skydiver down because it causes air resistance, or drag force. The air pushes the parachute back up, and creates a force opposite to the force of gravity, slowing the skydiver down. As the skydiver falls slowly to the earth, these “push and pull” forces are nearly in balance.
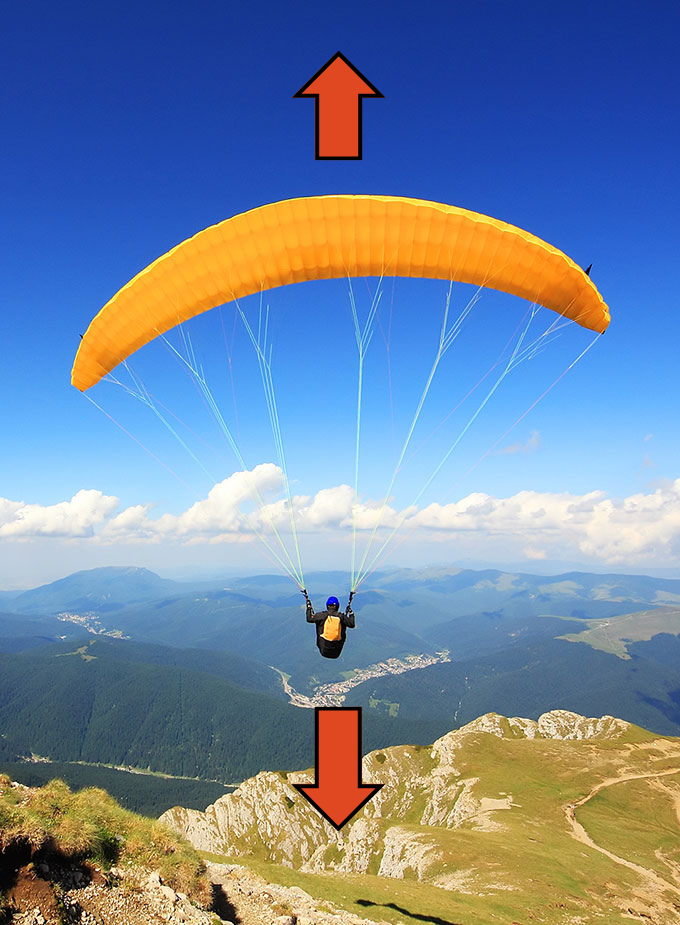
In this aerodynamics science project, you will test whether the size of the parachute is important for slowing down the speed of the fall. You will make a series of parachutes from small to large and test how quickly they fall from the same height. Will the large parachutes fall more slowly than the small parachutes?
Terms and concepts
- Parachute
- Gravity
- Air resistance
- Drag force
- Surface area
- Load
Questions
- How does a parachute work?
- How will increasing the diameter of the parachute increase its size, or surface area?
- Do bigger parachutes have more air resistance, or drag force, than smaller parachutes?
- How do you think the amount of drag force a parachute has will affect how well it works?
Materials and equipment
- Heavy weight garbage bags
- Metric ruler
- Scissors
- Light weight string (at least 6.4 m, or 21 ft)
- Washers (4) and twist ties (4) or pennies (8) and tape
- A safe, high surface about 2 m from the ground. A good place for your test might be a secure balcony, deck, or playground platform.
- Stopwatch, accurate to at least 0.1 sec
- Optional: Helper
- Lab notebook
Experimental procedure
1. Each parachute will be made out of the garbage bag material, so first cut open the garbage bags to make a flat sheet of plastic.
2. You will make a series of four parachutes of different sizes, from large to small. Each parachute will be square in shape, so the four sides will each be of the same length. Table 1 below shows the list of parachute sizes you will try.
| Parachute | Length of Each Side (cm) | Surface Area (cm²) |
|---|---|---|
| 1 | 20 | 400 |
| 2 | 30 | 900 |
| 3 | 40 | 1600 |
| 4 | 50 | 2500 |
3. Cut out each of the four differently sized parachutes from the garbage bag material.
- Tip: One trick is to fold the plastic sheet in half twice so that it is four layers thick. Then cut the two edges (opposite the folded sides) down to half of the length you want your square to be. When you unfold it, you will have your square!
4. For each parachute, tie a knot in each of its four corners. The knots will be used to anchor your string.
5. Cut 16 pieces of string, making each be 40 cm long. Each parachute will need four pieces of string.
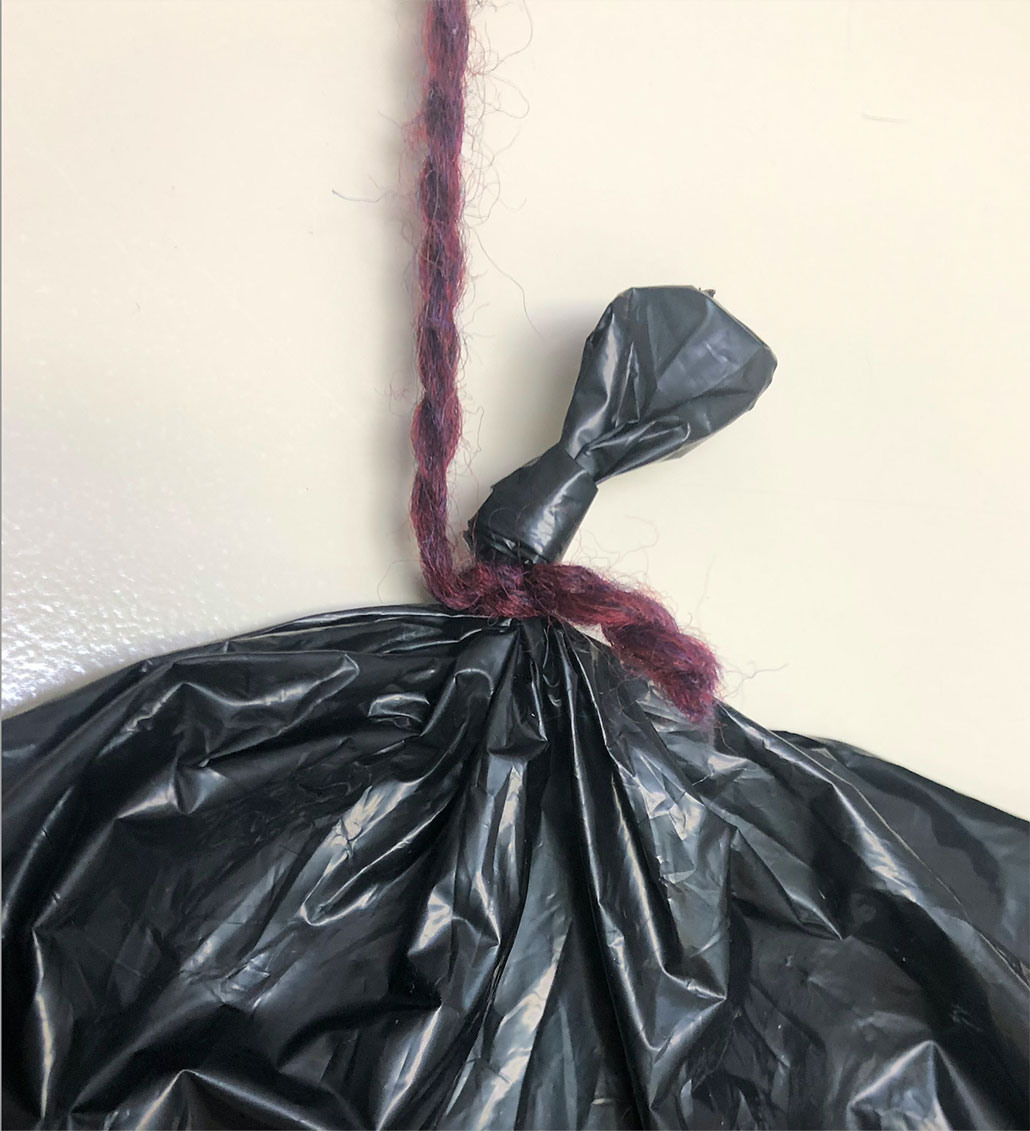
6. For each parachute, tie one end of each piece of string around one of the four knots, positioning the string right above the knot, as shown in Figure 2 below.
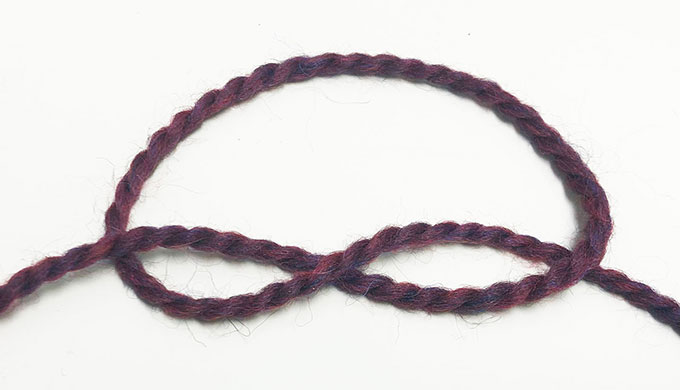
7. For each parachute, hold the center of the plastic sheet in one hand and pull all strings with the other to collect them. Tie the free end of the strings together with an overhand knot, as shown in Figure 3 below.
8. Attach one washer to each bundle of strings with a twist tie. Alternatively, if you are using pennies and tape instead, tape two pennies to each bundle of string.
- Be sure that each parachute has the same number of washers or pennies attached, or this will alter your results!
- Your parachutes should now look like one of the parachutes in Figure 4 below.
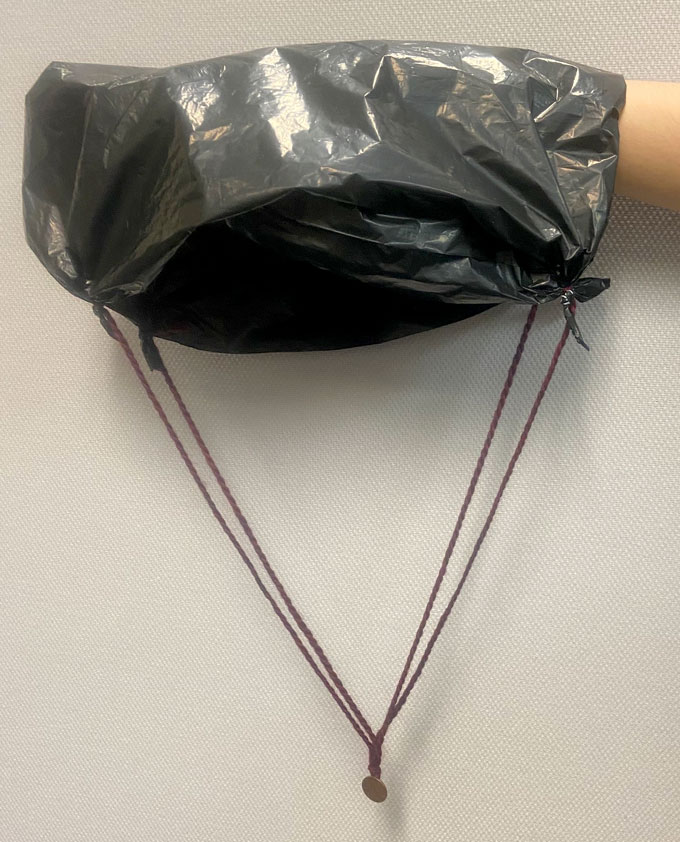
9. In your lab notebook, make a data table that looks like Table 2 below. You will be recording your results in this data table.
| Parachute # | Trial 1 (seconds) | Trial 2 (seconds) | Trial 3 (seconds) | Average Time (seconds) |
|---|---|---|---|---|
| 1 | ||||
| 2 | ||||
| 3 | ||||
| 4 |
10. Bring a stopwatch, the parachutes, and your lab notebook to a safe, high surface for your tests, about two meters (six feet) from the ground. A good place for your test might be a secure balcony, deck or playground platform.
11. Using your stopwatch, time how long it takes in seconds for each parachute to fall to the ground. Be sure to release the parachute from the same height each time. You may want to have a helper help time the parachutes when you release them.
- If the parachute does not open during a trial, just do that trial over so that when you are finished you have three trials which all worked.
- Test each parachute three times. Each time record your results in the data table in your lab notebook.
- Make an average of your data. Calculate the average by adding together your three times, and then dividing your answer by three. Record the averages in your data table.
- You can also increase the number of trials above three to get better data and organize your data table accordingly.
- Tip: If the parachutes seem to be falling too fast, you could try using a smaller washer or fewer pennies for each parachute. If the bottom of the parachute does not stay at the bottom as it falls, you could try using more washers or pennies for each parachute. Be sure to have the same size and number of washers or number of pennies on each parachute when you test them.
12. Now make a graph of your data. Make a line graph of time vs. surface area. “Time (in seconds)” should be on the y axis (the vertical axis), and “Surface area (in square cm)” should be on the x-axis (the horizontal axis).
You can make a graph by hand or use a website like Create a Graph to make a graph on the computer and print it.
13. After you connect the dots on your graph, your line may slope up or down. What does this tell you about the relationship between the surface area of the parachute and how long it takes the parachute to reach the ground? Which parachute was the most effective one? How do you think this is related to air resistance, or drag force?
Variations
In this experiment you tested one variable, the surface area of the parachute. What other variables could be tested? Try an experiment to test these other variables:
- Load – change the number of washers to change the weight of the load
- Height – drop the parachute from different heights
- String Length – change the length of the supporting strings from short to long
- String Weight – change the type of string from thin to thick
- Material – use different material for the parachute (nylon, cotton, tissue paper, etc.)
- Shape – try making parachutes of different shapes (circle, rectangle, triangle, etc.)
This activity is brought to you in partnership with Science Buddies. Find the original activity on the Science Buddies website.


