Experiment: Making music with bottles
Let’s investigate how the volume of air inside an instrument affects its pitch

Have you ever blown across a bottle’s top and noticed that it made a pleasant sound? In this experiment, we explore how the volume of air inside one of these containers affects its pitch.
emeraldnicola/Moment/Getty Images
Objective: Determine the relationship between musical note frequency and air cavity volume when blowing over the top of a partly filled bottle
Areas of science: Music
Difficulty: Medium intermediate
Time required: 2–5 days
Prerequisites: None
Material availability: Readily available
Cost: $20–50
Safety: No issues
Credits: Andrew Olson, Ph.D., and Teisha Rowland, Ph.D., Science Buddies
Some musical instruments produce sound from vibrating strings, others from vibrating reeds and still others from resonating columns or cavities of air. In this science project, you will study a simple example of the last type of instrument: a narrow-necked bottle partially filled with water.
How do musical instruments make the sounds that they do? All sound is made by vibrations. The vibrations push and pull on air molecules, changing the air pressure around them. The pushes cause a local compression of the air (increase in air pressure), and the pulls cause a local rarefaction of the air (decrease in air pressure). The compressions and rarefactions are rapidly transmitted through the air from the original source as a wave and are commonly called a sound wave. In summary, sound itself is a wave, a pattern, of changing air pressures.

The top part of Figure 1 represents the compressions (darker areas, increases in pressure) and rarefactions (lighter areas, decreases in pressure) of a pure-tone (i.e., single-frequency) sound wave traveling in air. If you measured the changes in pressure and graphed the results, you could see how pressure changes over time, as shown in the bottom of Figure 1. The peaks in the graph correspond to the compressions, and the troughs correspond to the rarefactions.

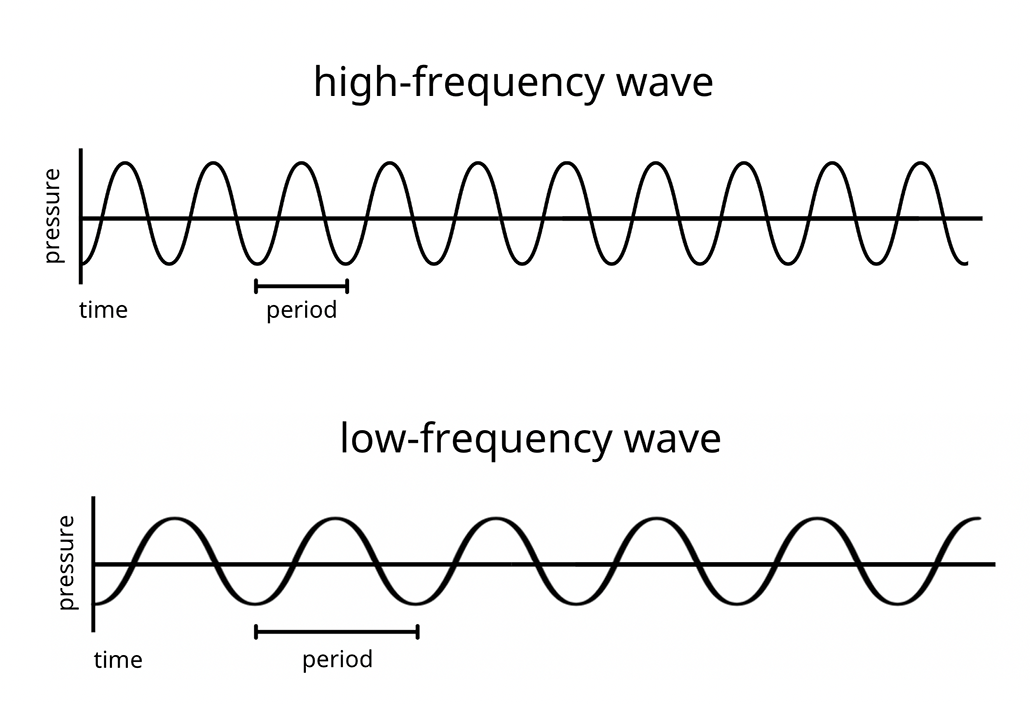
For a sound wave, the frequency of the wave is related to the perceived pitch or musical note of the sound. The higher the frequency, the higher the perceived pitch. Technically, the frequency of a wave describes how many cycles of the wave happen during a certain amount of time. This is measured in hertz, or cycles per second. On average, the frequency range for human hearing is from 20 hertz at the low end to 20,000 hertz at the high end. Figure 2 shows examples of sound waves of two different frequencies. The period in the wave is the time that it takes for a single cycle of the wave to pass. (For more information on how sound waves make certain frequencies and harmonics, check out the Science Buddies project idea Do-Re-Mi with Straws.)
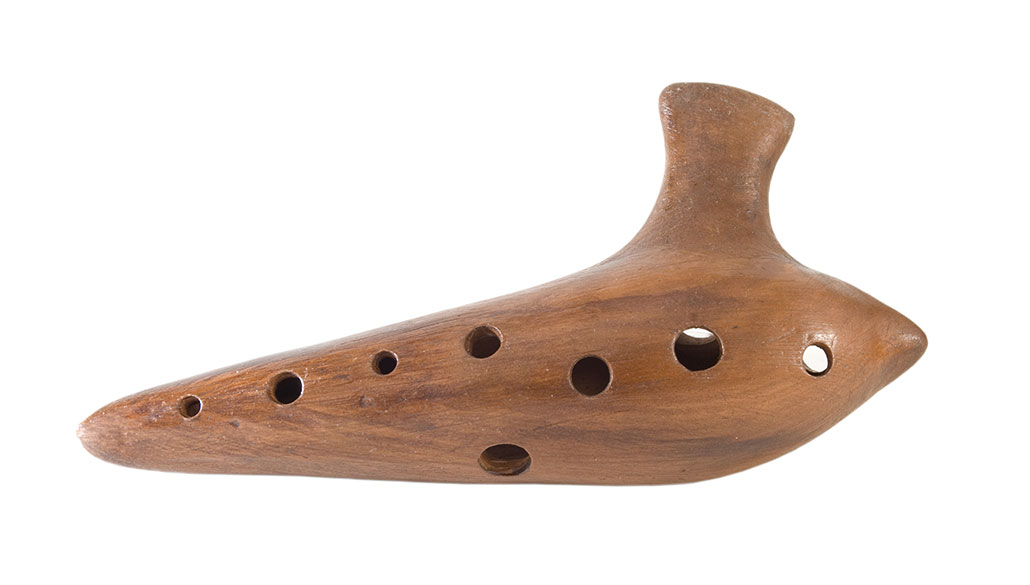
Containers with an opening that is smaller than the width of the container are called air cavities, also known as Helmholtz resonators. Certain musical instruments, like ocarinas (Figure 3), are Helmholtz resonators. Note that Helmholtz resonators are different from air columns, or containers where the opening is the same width as the rest of the container (similar to musical instruments like clarinets). The frequency of the sound wave generated by a Helmholtz resonator depends on the geometry of the opening (its area and length) as well as the volume of air inside the cavity. But what exactly is the relationship? In this science project, you will investigate how musical note frequency changes based on the volume of the empty space when producing notes by blowing over the top of a partially filled bottle.

Terms and concepts
- Sound
- Sound waves
- Pitch
- Musical notes
- Frequency
- Hertz
- Air cavity
- Helmholtz resonator
- Air columns
Questions
- How are sound waves made?
- What is the difference between the wave of a low frequency and the wave of a high frequency?
- What are some examples of Helmholtz resonators?
- How is the volume of air inside a Helmholtz resonator related to the frequency of sound it can make?
Resources
These are good resources on the physics of sound:
- The Physics Classroom. (n.d.). Sound Waves and Music. Retrieved August 22, 2014.
- Nave, C.R. (n.d.). Cavity Resonance. HyperPhysics. Retrieved April 12, 2021.
Materials and equipment
- Clean glass or plastic bottles with narrow necks (at least five). Use bottles that are different shapes and sizes so you have a variety to test
- Water
- Electronic chromatic tuner, such as Korg CA-40. Chromatic tuners are widely available in music stores and online through suppliers such as Amazon.com
- Metric ruler
- Optional: piano or keyboard for comparing notes
- Lab notebook
Experimental procedure
- In your lab notebook, make a data table like Table 1. You will be making a data table for each bottle you test. Table 1 has been partly filled in as an example. You will be recording your own results in your data table. Pick one of your bottles to test and label the data table with a description of that bottle, such as its volume (in milliliters) and its height and diameter (in centimeters).
| Bottle description: Plastic bottle, 500 mL, 19.5 cm tall by 6 cm in diameter | ||||
|---|---|---|---|---|
| Water level (cm) | Air level (cm) | Air volume (cm3) | Musical note | Frequency of the note (Hz) |
| 0 | 19.5 | |||
| 9.75 | 9.75 | |||
| 14.6 | 4.9 | |||
| etc. | etc. | |||
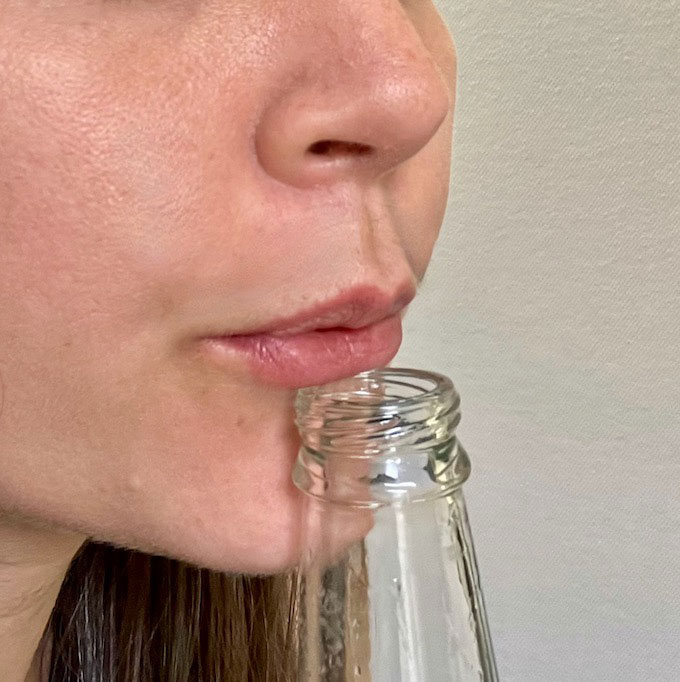
- Try blowing across the top of the bottle you selected to make a resonant sound. Do this by touching your lower lip to the edge of the bottle, pursing your upper lip and blowing gently over the opening, as shown in Figure 4, below. When you get the airflow just right, you will hear a musical note as the air column in the open bottle resonates.
- Note: If you cannot make a note using the bottle when it is empty, try using a different bottle for this science project.

- Use the chromatic tuner to see which musical note is sounding. Record the note and the frequency of the note (in hertz [Hz]) in the data table in your lab notebook.
- Be sure to also record the water level (in cm) and air level (the height of the empty space in the bottle, in cm) in the same row in your data table.
- For example, if the bottle is 19.5 cm tall and is empty, the water level would be 0 cm and the air level would be 19.5 cm. Similarly, if the bottle is half-filled with water, the water level and air level would both be 9.75 cm.
- Optional: You could use a piano or keyboard to compare the notes.
- Add some water to the bottle. You can fill the bottle with a certain amount of water, such as by filling it half full or three-quarters full, or you could just add a little water at a time. Then repeat steps 2–3.
- How does the pitch of the note change? Is it higher or lower than before?
- If you want, you could try to figure out how much water you need to add (or remove) to get a half-step change in pitch (e.g., from C to C-sharp, or from A to A-flat).
- Repeat step 4 at least 8 more times, testing what note the bottle makes when it is filled with different amounts of water. This means you should test at least 10 different water (and air) levels in the bottle. This will give you a good amount of data to analyze and draw conclusions from.
- Repeat steps 1–5 with each of your different bottles.
- Calculate the volume of air in the bottle for each water level, not including the neck. For bottles with varying cross-sectional areas, you may need to use an approximation or combine two different shapes (e.g., a cylinder connected to a cone or multiple cylinders of different diameters) to calculate the total volume.
- After you are done testing all of your bottles, make a line graph of your results. Make a line for each bottle you tested, and on the y-axis (the vertical axis) put the frequency of the notes (in Hz). On the x-axis (the horizontal axis), put the air volume (in cm3).
- Analyze your results and try to make some conclusions.
- How is the pitch of the note produced related to the air volume?
- Do you see any patterns in the relationship?
Variations
- Using a series of identical bottles with different amounts of water, can you produce a series of notes in a musical scale?
- What happens if instead of blowing over the top of the bottle, you tap the bottle (below the waterline) with a wooden mallet? How does the note produced by tapping change with water level in the bottle? Can you explain how this works?
- You can also make musical notes by rubbing the rim of a stemmed wine glass with a wet finger. With wine glasses, the note frequency also changes as the fluid level is increased, but in the opposite direction of the bottles used in this experiment. Obviously, the physics of musical wine glasses must be different! Find out more with the Science Buddies project Singing Wine Glasses.
This activity is brought to you in partnership with Science Buddies. Find the original activity on the Science Buddies website.


